In a nutshell
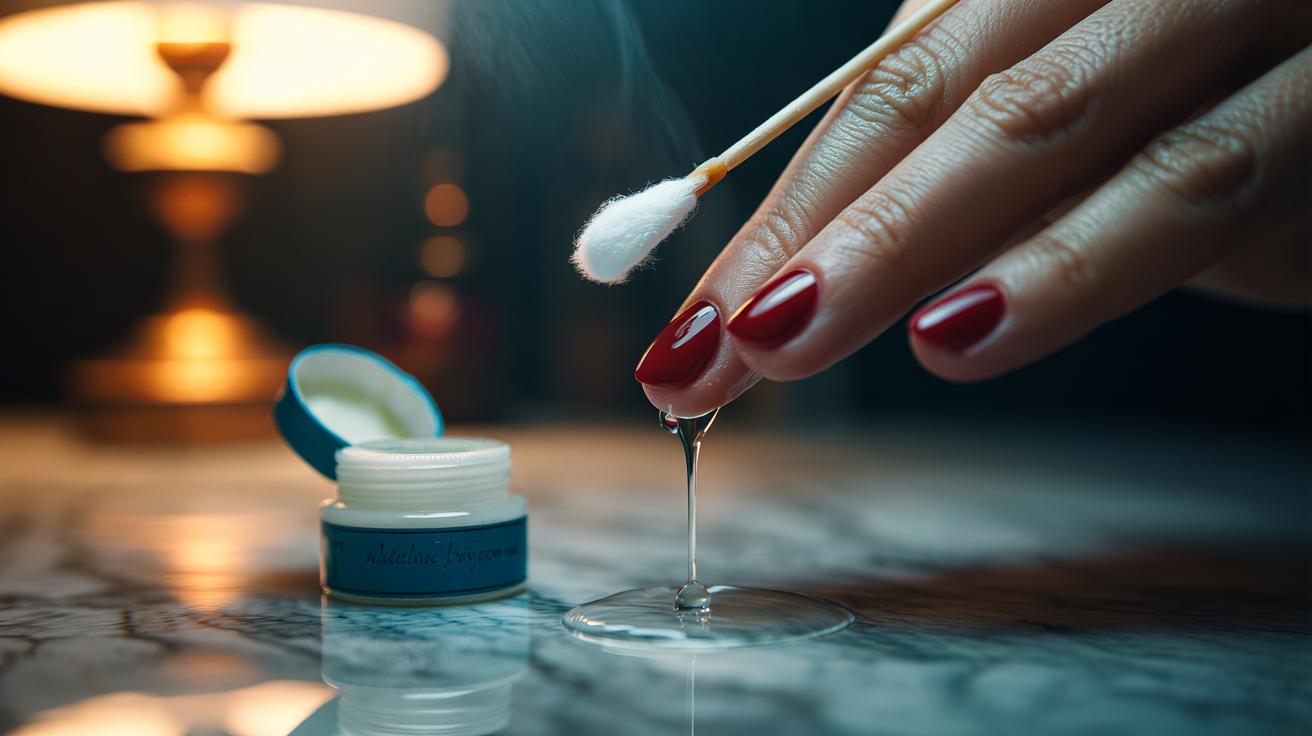
- 💅 Use a £1 Vaseline barrier after polish fully cures to seal the free edge and sidewalls, creating a hydrophobic line that stops water sneaking under colour and causing chips.
- 🧪 The science: chipping starts at edges as nails expand/contract with moisture; petroleum jelly forms a flexible, occlusive shield—apply only after polish sets, never before a base coat.
- 🧰 Step-by-step: prep, base coat, two thin colour layers (cap the edge), top coat, wait 10–20 minutes beyond touch-dry, then micro-swipe Vaseline with a cotton bud—consistency over quantity.
- 🧤 Maintenance & myths: reapply a pinhead amount after washing or pre-shower; thin use won’t dull shine; works with gels too; avoid near nail glue; refresh top coat midweek, then reinstate the Vaseline barrier.
- 💷 Big results, tiny spend: for ~£1 you get longer-lasting, chip-resistant gloss and a salon finish at home; pair with gloves for chores and weekly cuticle care for best wear.
What if the secret to a chip-proof, salon-sleek manicure was sitting in your bathroom cabinet for £1? The humble pot of Vaseline—petroleum jelly by another name—has a trick that beauty pros whisper about and busy people swear by. A whisper-thin application at the right moment creates a hydrophobic shield that keeps water out, locks flexibility in, and helps colour cling for far longer. No UV lamp. No expensive gel removal. Just science and simplicity. Apply in seconds, reap the benefits for days. Used correctly, this tiny barrier can stretch your polish’s lifetime from a weekend to multiple weeks. Ready to cheat chips without cheating your budget?
The Science Behind the Vaseline Shield
Chipping rarely starts on the surface; it begins at the edges where daily life attacks your manicure. Washing-up, hot showers, cold air—your nail plate absorbs and releases moisture, swelling and shrinking. That micro-movement pries polish from the tip. A wisp of petroleum jelly placed at the seam where nail meets air creates a moisture-repellent line. It doesn’t fuse with the lacquer, and it shouldn’t—what it does is stop water from sneaking under the colour, the number one trigger for early lift and peeling.
Think of Vaseline as a flexible raincoat for the most vulnerable millimetre of your manicure. Because it’s occlusive, it also keeps the nail edge from drying out, which reduces brittleness and the tiny fractures that become chips. Importantly, timing is everything. Apply after your polish and top coat have fully cured so you don’t interfere with adhesion. Then refresh that line after handwashing or before chores. Used this way, the jelly supports the polish, instead of breaking it down. The result? Chip-resistant colour that bends with your day rather than cracking under it.
Step-by-Step: Salon Finish at Home
Prep clean, dry nails. Gently buff, wipe with alcohol, and apply a gripping base coat. Paint two thin coats of colour, capping the free edge each time. Seal with a glossy top coat and let everything cure properly—10 to 20 minutes beyond “touch-dry.” Now the trick: take the tiniest amount of Vaseline on a cotton bud and trace a hairline film under the free edge and along the sidewalls, where polish meets skin. Use the thinnest smear; shine, not slick.
Daily maintenance takes seconds. After washing hands or before a shower, reapply that whisper-thin film at the tips. Avoid coating the polish surface on day one to keep the gloss pristine; from day two, a barely-there veil over the very edge won’t dull shine and greatly improves water resistance. If you smudge, wrap a tissue around a fingertip and wipe. Consistency beats quantity—little and often wins.
| Item | Why You Need It | Typical UK Cost |
|---|---|---|
| Vaseline (petroleum jelly) | Creates a hydrophobic barrier at the tip | £0.80–£1.50 |
| Base coat | Improves adhesion, prevents staining | £4–£10 |
| Top coat | Seals colour, adds shine and strength | £5–£12 |
| Cotton buds/tissue | Precise placement and cleanup | £1–£2 |
The whole routine takes less than two minutes beyond your usual manicure—and pays back for weeks.
Troubleshooting, Myths, and Pro Tips
Myth one: “Oil ruins polish.” True before painting; false after curing. Don’t apply Vaseline on the nail plate before base coat—adhesion suffers. Do apply after the top coat sets. Myth two: “Jelly dulls shine.” Only if you overdo it. A micro-sheen at the perimeter won’t cloud your gloss. If needed, refresh top coat midweek, then reinstate the Vaseline barrier at the edges once dry.
Common pitfalls? Using too much. That invites lint, smudges, and frustration. A pinhead amount is plenty for all ten nails. Painting at night? Let polish harden while you read, then trace the edge before bed to protect against morning shower swell. Wearing gels? This trick still helps—water can infiltrate cured gels at the margins; a jelly seal slows that down. Press-ons or nail glue? Skip the jelly near the bond line; occlusives can weaken adhesives.
Pro tips from manicurists: file the free edge smooth before painting to remove micro-nicks, then “cap” every coat. Wear gloves for cleaning. Keep a mini pot in your handbag and swipe the tips after a commute or gym session. Combine with a once-a-week cuticle massage—hydration at the border, strength in the plate, and a salon finish that sticks around.
For the price of a bus fare, you can build a smarter manicure: a tight prep, thin polish layers, and a protective Vaseline seal that keeps water out and colour on. The payoff is real—fewer touch-ups, fewer chips, more compliments. Give it one week of consistent use and watch the change in wear time. Your nails will look freshly done even on day nine, day ten, perhaps beyond. Will you try the £1 barrier trick tonight and see how long your polish lasts when the edges are finally on your side?
Did you like it?4.5/5 (26)