In a nutshell
- 🧪 Tarnish is silver sulphide (Ag2S) formed by airborne sulphur; baking soda lifts it via mild alkalinity and fine abrasion that loosens grime and detaches the sulphide film.
- ✨ The method’s power is dual-action: self-dulling bicarbonate crystals polish to a mirror finish quickly while limiting scratches, delivering results in minutes with a quick rub.
- 🧴 How-to: mix a paste (3:1 baking soda:water), apply with a soft microfibre cloth in light circles, use a soft brush for crevices, then rinse and dry immediately for crisp, bright surfaces.
- 🛠️ Choose the right approach: an aluminium-foil bath helps with heavy or intricate tarnish; commercial polishes suit severe cases—go gently on silver plate to preserve the thin layer.
- ⚠️ Aftercare and risks: avoid contact with soft stones/niello, store in anti-tarnish bags with silica gel, and handle with gloves to slow re-tarnishing and extend time between polishes.
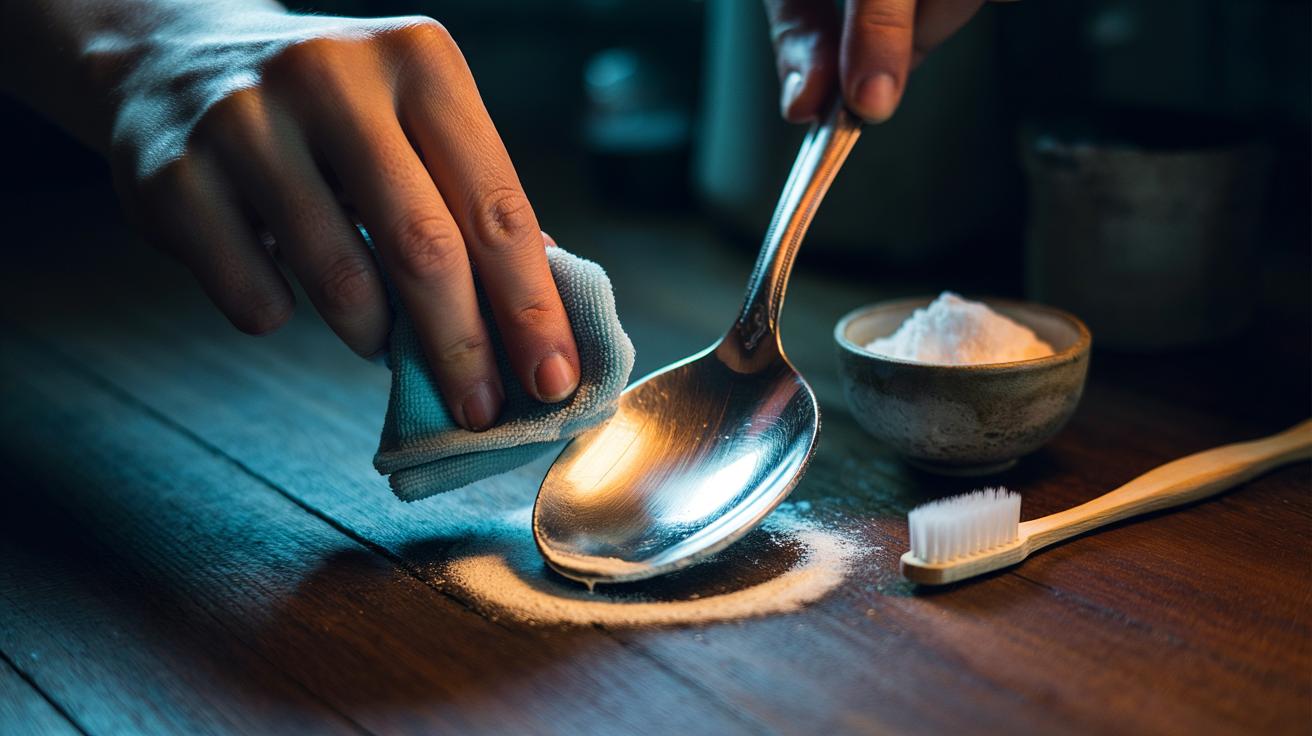
Pick up a dull silver spoon and you’ll see history etched in grey: a thin film of tarnish that steals the gleam. Reach for baking soda, though, and the shine returns with startling speed. This isn’t just a hack; it’s chemistry with a dash of physics. The mildly alkaline powder disrupts grime and sulphur-laden residues, while its fine crystals act as a gentle polish, lifting silver sulphide without brutal scratching. Add a little water, rub briefly, rinse, dry. Done. The transformation to a mirror finish often takes minutes, not hours. Here’s how those tiny particles do outsized work, and how to use them wisely on family silver and market finds alike.
What Tarnish Really Is on Silver
That darkening isn’t dirt; it’s chemistry. Sterling and fine silver react with airborne sulphur compounds—think trace hydrogen sulphide from city air, wool, even some foods—to form silver sulphide (Ag2S). The layer is incredibly thin at first. Uniform, stubborn, and slightly oily to the touch once it mingles with skin lipids and kitchen films. Left alone, it thickens unevenly, muting reflection and killing sparkle.
Because Ag2S bonds to the surface, you can’t simply wipe it off with water. Acids don’t help much either, and can harm adjacent materials. Sodium bicarbonate—baking soda—steps in differently. It raises surface pH slightly, helps detach greasy binders that make tarnish cling, and provides a fine mechanical abrasion that skims the top of the sulphide layer. Think of it as a precision sandpaper that stops short of the silver beneath when used with a light hand. The result: a controlled removal of the topmost tarnish molecules, revealing a brighter metal surface that readily reflects light again.
Why Baking Soda Works So Well
The secret is a dual action. First, the alkaline nature of baking soda (pH around 8–8.5 in solution) neutralises faint acids and loosens organics that lock tarnish in place. Second, its crystalline particles are small and friable; they fracture during rubbing, which prevents deep scratching and gives a progressively finer polish. This “self-dulling” abrasiveness is what makes a quick rub both effective and relatively safe for solid silver. Light pressure is enough; force isn’t required, nor is a long grind.
There’s also adsorption at play. The powder can trap loosened sulphide and grime, keeping them from re-smearing. Compared with toothpaste or coarse scouring powders, bicarbonate sits in a sweet spot: assertive enough to shift the film, gentle enough to preserve crisp edges and inscriptions. When moisture forms a paste, capillary action helps carry away debris. Result: cleaner micro-grooves, fewer hazy halos, a faster route to that coveted mirror finish.
| Method | Primary Action | Best Use | Typical Time | Caution |
|---|---|---|---|---|
| Baking soda rub | Mild abrasion + alkalinity | Solid silver, light–moderate tarnish | 1–3 minutes | Go gently on silver plate |
| Aluminium-foil bath | Electrochemical sulphide transfer | Intricate items with heavy tarnish | 5–10 minutes | May alter antique patina |
| Commercial polish | Chemical complexing + abrasion | Severe tarnish or showroom sheen | 3–8 minutes | Check ingredients, avoid harsh grit |
The Quick-Rub Method Step by Step
Start with a clean slate. Wash the piece briefly in warm water with a drop of mild washing-up liquid, then dry. Make a paste: three parts baking soda to one part water. It should be spreadable, not runny. Using a soft microfibre cloth or cotton pad, pick up a pea-sized dab and work in small circles. Short strokes on flat areas. Feather-light pressure on engravings. Let the particles do the work; you are guiding, not grinding.
Watch the surface as you go. A bright ring will appear where tarnish yields. Add a touch more paste if it drags. For crevices, use a soft baby toothbrush, almost tickling the metal to avoid cutting into detail. Rinse thoroughly in warm water to remove every trace of powder and suspended grime. Then dry immediately with a fresh cloth, pressing rather than rubbing to avoid introducing new micro-scratches. On solid silver, the process is swift. On silver plate, keep sessions brief and gentle, because the plated layer is thin and precious.
If an item is heavily blackened, consider a staged approach: one light pass today, another tomorrow, or switch to an aluminium-foil bicarbonate bath for creviced pieces where rubbing is awkward. Finish with a clean polish cloth to bring up the final lustre.
Limits, Risks, and How to Keep the Shine
No polish is magic. Baking soda can’t fill pits or reverse corrosion undercuts; it removes the Ag2S layer but doesn’t rebuild lost metal. On intentionally oxidised finishes (gunmetal accents, niello, darkened recesses), a vigorous rub can erase design contrast—test discreetly. Avoid contact with soft stones, pearls, or glued settings; alkaline pastes and moisture can weaken adhesives and cloud organics. When in doubt, isolate the metal with tape and work slowly.
After polishing, slow the return of tarnish. Store pieces in anti-tarnish bags or with intercept strips that scavenge sulphur. Keep humidity moderate with silica gel. Wear cotton gloves for display handling to keep skin oils off reflective planes. A micro-thin wax designed for metals can add a sacrificial barrier, but apply sparingly to avoid dulling. Day to day, a soft cloth wipe after use removes fingerprints—the very start of the next tarnish cycle. Respect those steps and the interval between polishes stretches from weeks to months.
Baking soda’s appeal lies in its balance: household-simple yet scientifically sound. The gentle alkaline lift and fine-particle abrasion free silver from sulphide and grime with a speed that surprises, especially when paired with deft, light-handed technique. Treat intricate heirlooms cautiously, protect plated pieces, and control the environment to lock in brilliance. Next time a spoon or locket turns sullen, you now possess the why and the how to revive it. What piece of silver in your home is waiting for a careful, two-minute transformation and a return to centre stage?
Did you like it?4.4/5 (23)