In a nutshell
- 🎯 Use low-tack painter’s tape to mock up frames at full size, test layouts without damage, and achieve a balanced gallery wall with clean removal.
- 📐 Follow a map–test–hang method: set an eye-level line around 145 cm, tape the outer footprint, create frame rectangles, mark precise fix points, and nail through the tape for accuracy.
- 🧩 Nail spacing and scale: keep gaps at 5–8 cm, align to a central visual horizon, anchor with one larger piece, and adapt for grids, salon-style mixes, or stair inclines.
- 🛠️ Build a thrifty toolkit: painter’s tape (£3–£6), spirit level, tape measure, plus kraft paper templates or picture-hanging strips; a laser level is optional.
- 🌿 Protect finishes and planet: wait 30 days after fresh paint, choose extra-low-tack on delicate walls, press edges on light texture, and opt for solvent-free tape and recyclable templates.
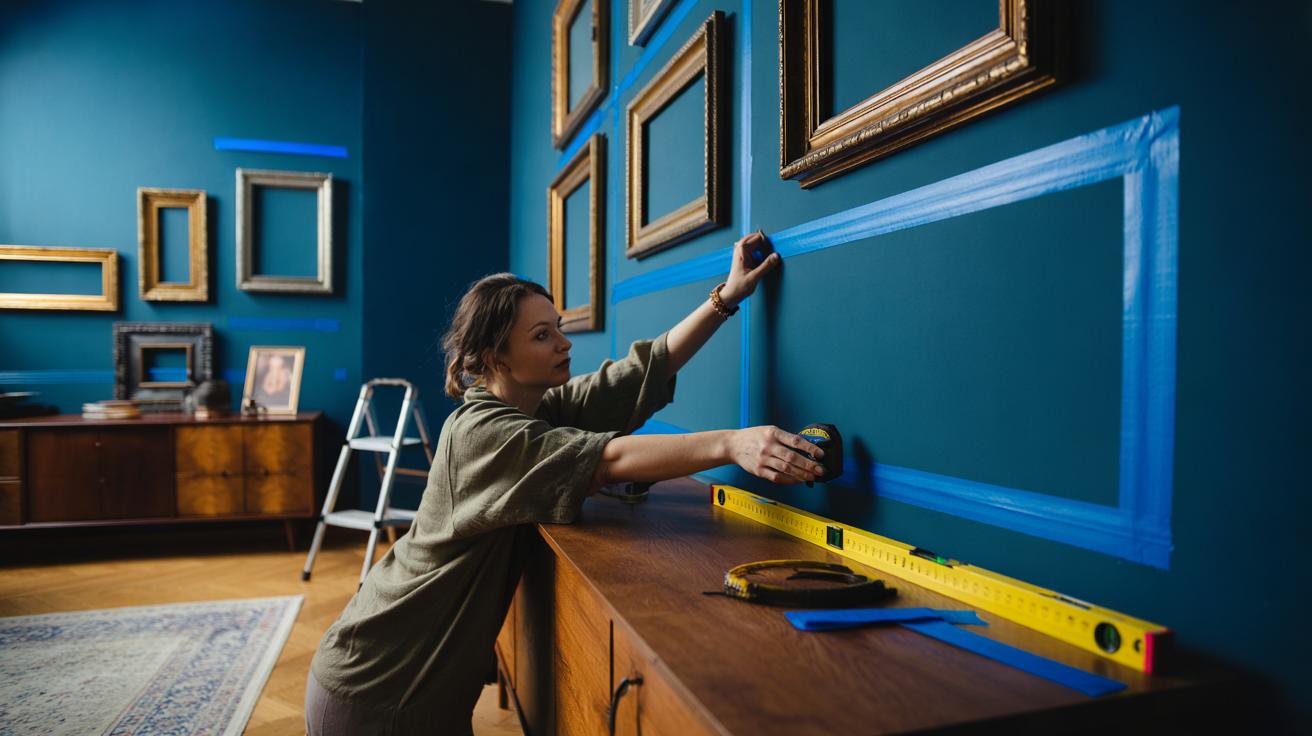
Every successful gallery wall shares a small secret: low-tack painter’s tape. It’s inexpensive, unfussy, and astonishingly effective. Before a single nail is tapped, tape lets you sketch full-scale compositions on the wall, repositioning shapes until the arrangement clicks. No guesswork. No unnecessary holes. For renters and perfectionists alike, that matters. The trick works in living rooms, stairs, bedrooms, even narrow hallways bridged by awkward radiators. Because tape peels cleanly, you can explore bold layouts without risking your fresh paint. The result is a truly considered display that feels intentional, balanced, and personal—precisely what a gallery wall should be.
Why Painter’s Tape Is the Secret Weapon
The big advantage is in the name: low-tack. Good tape grips long enough to map frames and spacing yet lifts without tearing paper or pulling emulsion. That makes it ideal for “mocking up” your gallery wall at full size, so you can judge scale, balance, and colour relationships from across the room. A roll costs just a few pounds and goes a long way, which is why seasoned DIYers swear by it. It delivers professional-level precision for pocket change. You can create crisp horizontal and vertical guides, test multiple compositions, and label zones for a unified story—family photos here, graphic prints there, mirrors anchoring the centre.
There’s more. Tape acts as a temporary measuring tool and a communication tool. Mark frame boundaries with tape rectangles, then step back and edit: shrink, expand, swap, rotate. Code ideas in seconds—blue tape for keepers, green for maybes. Add quick notes directly onto the tape: artist, glaze type, orientation. Because it’s reversible, you avoid the sunk-cost fallacy of a first attempt. Live with the proposed layout for a day or two; the right arrangement will prove itself every time you walk past.
Step-by-Step: Map, Test, and Hang With Confidence
First, measure the wall and decide the overall footprint—roughly the width of your sofa or sideboard, and centred on a focal point. Strike a central eye-level line at around 145 cm from the floor using a spirit level and a strip of tape. This becomes your anchor. Tape out the outer edges of the gallery area. Next, map each frame with tape rectangles the exact outer size of the frames you intend to hang. Shuffle the rectangles until you’re happy with flow and sightlines. Trust your eye, but let the tape do the hard work of holding the plan in place.
When the composition is set, mark fixing points. For frames with cords, place a bit of tape where the hook will sit, then measure the drop from the top of the frame and mark the exact nail location on the tape. For sawtooth or D-rings, press the hardware into a small piece of tape to imprint/mark, then transfer that to the wall. Drill or tap nails through the tape for ultra-clean positioning, then peel away. Hang, adjust micro-millimetres with tiny tug tests, and finish by checking the grid with your level. This is the single cheapest way to get pro-level results on the first try.
Spacing, Scale, and Symmetry Made Simple
Great gallery walls look relaxed but disciplined. Tension lives in the margins—those gaps between frames. Start with consistent spacing of 5–8 cm. Use narrow tape strips as improvised spacers while you test. Larger pieces deserve breathing room; petite prints can cluster tighter. Maintain a steady “visual horizon” by aligning either the top edges or mids of key frames with your central guide line. For staircases, echo the incline: tape a parallel line to the handrail and step your frames along it. Consistency in spacing is what makes a busy wall feel calm.
Scale is your other lever. Anchor with one substantial piece near centre, then orbit smaller works around it to avoid a scattered look. If you prefer strict symmetry, let tape lay out a matrix: columns and rows, perfectly plumb. For eclectic, salon-style displays, tape still helps you keep edges tidy and avoid creeping too close to skirting, sockets, or cornices. Heavy frames? Make paper templates, tape them as stand-ins, and hang with confidence after testing. When in doubt, pull back a centimetre rather than crowding. Air is part of the composition.
Cost, Tools, and Smart Alternatives
The beauty here is thrift. One roll of low-tack masking tape (also sold as painter’s tape) costs roughly £3–£6 in the UK. Use it with a basic spirit level, a tape measure, and a pencil. If paint is new, wait at least 30 days before applying tape to avoid imprints. On delicate finishes, choose extra-low-tack variants and test behind a frame. You can combine tape with brown kraft paper templates for heavy or unusual shapes, keeping cut-outs until you’ve lived with the layout. It’s a lightweight system that avoids filler, sanding, and second-guessing.
| Tool | Typical UK Price | What It Solves | Notes |
|---|---|---|---|
| Low-tack masking tape | £3–£6/roll | Layout, spacing, guides | Peels cleanly; write labels on it |
| Kraft paper templates | £5–£10/roll | Full-size mock-ups | Hinge with tape; great for heavy frames |
| Picture-hanging strips | £4–£12/pack | No-nail mounting | Weight limits; check paint compatibility |
Sustainability matters too. Look for paper-backed tapes with solvent-free adhesives, and recycle kraft paper templates. If your walls are slightly textured, press tape edges down with a clean cloth for better adhesion, but don’t force it on crumbly plaster. For ultra-precise grids, add a budget laser level—nice to have, not essential. The tape still does the heavy lifting.
A gallery wall should feel effortless. Painter’s tape makes it so—transforming a jumble of frames into a crisp, story-rich composition you’ll actually keep. It’s fast, reversible, and kind to both paintwork and nerves. Spend a few pounds on tape, save hours of patching. Plan in blue (or green), hang once, smile for years. Ready to try it? Start with one confident anchor piece, tape your boundaries, then let the layout grow. What tale will your walls tell when you give yourself the freedom—and the cheap, clever tools—to experiment first?
Did you like it?4.5/5 (21)