In a nutshell
- 🧪 Science-backed clean: baking soda provides a mild alkaline lift while fine salt adds micro-abrasion, loosening soap scum and oils fast.
- 🧽 Simple method: mix 2:1 (bicarb:salt) to a yoghurt-thick paste, apply to grout, allow dwell time 5–10 minutes, scrub in tight circles, rinse, and dry.
- ⚠️ Safety and surfaces: wear gloves, never mix with bleach or pre-add vinegar, avoid on natural stone and polished metal trims, and check grout sealer cure times.
- 💷 Why choose it: ultra-low cost, precise control over thickness and abrasion, no harsh fumes, and kinder to coloured grout than many shop-bought cleaners.
- ✨ Results and upkeep: delivers visibly brighter lines in minutes, doubles as mild grout haze polisher, ideal for weekly refreshes and pre-guest blitzes.
Grimy grout lines make even the cleanest bathroom feel tired. Yet a humble pairing, salt and baking soda (sodium bicarbonate), can flip that script quickly. This DIY grout brightener costs pennies, uses cupboard staples, and works astonishingly fast. The trick is the combo: a gentle alkaline lift from bicarbonate and a fine, crystalline abrasive action from salt. Together they dislodge soap scum, oils, and mildew-tinted films without harsh fumes. Used right, it’s surprisingly efficient. Used wrong, it can leave residue. Here’s how to get tiles pristine in minutes, with the science explained, a practical recipe, and the safety notes professionals swear by. Small effort, big return.
Why Salt and Baking Soda Work on Grout
Grout is porous, thirsty, and quick to stain. That porosity traps oils and soap residues, which then cling to mineral microtextures. Enter baking soda, a mildly alkaline powder that helps saponify greasy soils and soften biofilms so they release more readily under light agitation. Salt, particularly fine table salt, adds micro-abrasion. Think very gentle sandpaper that scuffs the top layer of grime without gouging the grout. Crucially, the two aren’t just scrubbing; they alter the chemistry of the dirt, making it lift with fewer strokes. This is why the mixture feels effortless once it starts working.
The synergy also matters for time. Sodium bicarbonate’s alkalinity begins loosening bonds almost immediately, but the salt keeps the paste “toothy” so it doesn’t slide off vertical joints. In humid bathrooms, salt’s osmotic pull draws a bit of moisture from the film you’re trying to remove, enhancing contact. No bleach. No sharp acids. Just a controlled, mechanical-chemical clean that shows up as brighter, less shadowed lines. If your tiles have a slight grout haze from past work, this paste doubles as a mild polisher. It’s tidy, fast, and forgiving—ideal for weekly refreshes or pre-guest blitzes.
Step-by-Step Method for Rapid Results
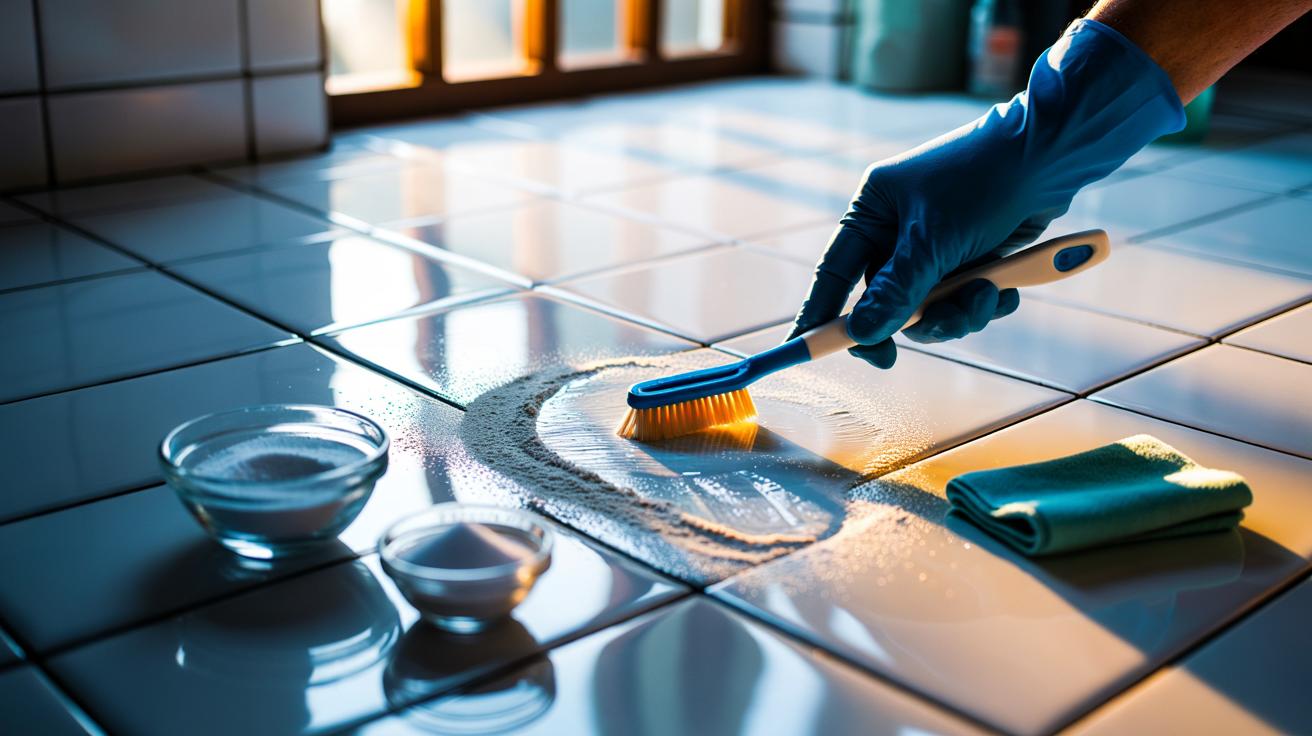
First, vacuum or wipe away loose dust; grit dulls tiles. In a small bowl, mix 2 parts baking soda to 1 part fine salt. Add just enough water to form a thick paste—think yoghurt, not slurry. Apply along the grout lines with a small spatula or a gloved fingertip. Let the paste sit; the dwell time does the heavy lifting. For light soil, 5 minutes. Heavier stains, 8–10 minutes. Then scrub with a grout brush or an old toothbrush using small, tight circles. Rinse with warm water and buff tiles dry with a microfibre cloth to prevent streaks.
| Soil Level | Ratio (Bicarb:Salt) | Paste Amount per m² | Dwell Time |
|---|---|---|---|
| Light | 2:1 | 30–40 g | 5 minutes |
| Medium | 2:1 | 50–60 g | 8 minutes |
| Heavy | 3:1 | 70–90 g | 10 minutes |
For stubborn corners, mist very lightly with water and re-scrub; the paste reactivates. A final optional flourish: a quick wipe with a diluted washing-up liquid solution (a few drops in 500 ml warm water), followed by a plain-water rinse. Avoid adding vinegar at this stage—neutralising the alkaline paste prematurely blunts its power. If you love a final fizz, rinse, then spritz vinegar, and rinse again. Dry thoroughly to leave grout crisp and tiles sparkling.
Safety, Surfaces, and Common Mistakes
Wear light household gloves. Dry skin can snag on grout and the salt will not be kind. Ventilation is simple: crack a window, keep air moving, especially in small shower rooms. The mixture is gentle, but do not mix it with bleach or premix it with vinegar. Bleach adds risk with no benefit here; vinegar neutralises the bicarbonate and kills the clean. Patch-test first on a discreet corner. Most ceramic and porcelain tiles are safe; natural stone like marble or travertine is not, as grit can mar the polish and alkalinity can dull the surface.
Watch the sealer status. Freshly sealed grout should cure fully (check the product—often 24–72 hours) before any scrubbing. On old grout, pre-wet the lines with a quick wipe; slightly damp grout resists absorbing residue and helps the paste sit on the surface where it can work. Avoid coarse sea salt; the crystals can scratch. Keep paste off polished metal trims—wipe immediately if contact happens. The final rinse matters. Leftover powder dries cloudy and can attract moisture marks. Finish with a dry cloth for best clarity and that just-installed look.
How It Stacks Up Against Shop-Bought Cleaners
Commercial grout cleaners promise speed. Some deliver, particularly those with oxidisers or solvents, but they can carry strong odours and splash risks. The salt and baking soda paste is compelling for three reasons: cost (pence per session), control (you dictate thickness, dwell time, and abrasion), and calm—no choking fumes on a winter morning. It’s also kinder to coloured grout lines that can blanch under harsh agents. On routine maintenance, it frequently equals branded sprays. On deeply set mould staining, it’s a solid pre-clean that preps the surface for a targeted mould treatment if needed.
Performance hinges on technique. Press lightly and let chemistry assist the scrub. Time your dwell. Rinse fully. Where spray-and-rinse products rely on potent chemistry, this method relies on smart contact and mild abrasion. That makes it more predictable on mixed surfaces found in UK bathrooms—porcelain tiles, glazed ceramics, and silicone edges coexisting. For most households, the paste becomes the default, and the heavy artillery gathers dust under the sink. It’s the newspaper columnist’s favourite kind of tip: practical, frugal, and slightly satisfying to use.
In the end, a quick pot of baking soda and salt restores grout to a clean, pale line that sets off your tiles. Minimal faff, minimal cost. The method suits weekly touch-ups and deep-cleans alike, and it avoids the nose-wrinkling sting of aggressive chemicals. If you’re gentle with the scrub and thorough with the rinse, the results belie the simplicity. Your bathroom looks calmer, brighter, more intentional. What’s your biggest grout challenge at home—persistent shadowing in the shower, kitchen splashback splatters, or a patchy hallway floor—and which part of this routine will you try first?
Did you like it?4.7/5 (22)