In a nutshell
- 🍰 Prioritise technique over tools: control temperature, touch, and timing; keep ingredients cold and rest the dough to relax gluten and firm fat.
- 📏 Follow the golden ratio 3:2:1 (flour:butter:water), add fine salt, drizzle ice-cold water sparingly, and use a touch of vinegar or lemon to limit gluten.
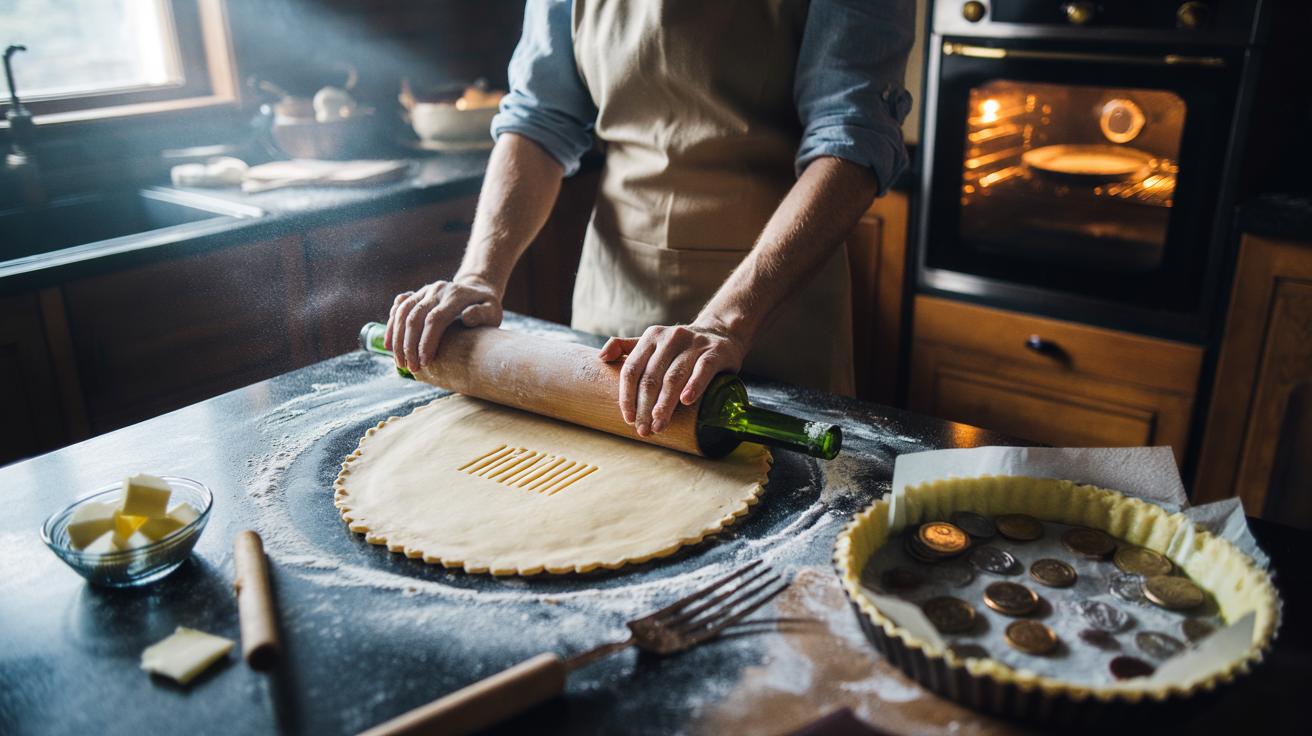
- 🧰 Swap gadgets for everyday items: use fraisage, a wine bottle as a rolling pin, a fork for docking, and coins/rice as pie weights; trim cleanly with a sharp knife.
- 🔁 Build flake with quick technique: make rough puff with three single folds, rotate the dough not the roller, and chill between steps to prevent shrinkage.
- 🔥 Bake for crisp bases: preheat a heavy tray for strong bottom heat, shield edges with foil, and seal blind-baked shells with egg white to resist soggy fillings.
British pastry chefs whisper the same simple truth in kitchens from Cornwall to the Cairngorms: you don’t need specialist kit to turn out exquisite tarts, pies, and puff. What you need is control. Temperature, touch, timing. With a bag of plain flour, a block of cold butter, a splash of water, and a clean surface, you can produce layers that shatter and crumbs that melt. A wine bottle stands in for a rolling pin. A fork replaces docking wheels. Coins, beans, or rice become pie weights. Technique beats technology every time. Here’s how professionals strip pastry back to its essentials and let physics, not gadgets, do the heavy lifting.
The Golden Ratio and Temperature Control
Start with the classic shortcrust proportion: 3:2:1 — three parts flour, two parts butter, one part water by weight. For a 23 cm tart tin, that’s 300 g flour, 200 g butter, 100 g ice-cold water, plus a pinch of fine salt. Keep everything cold. Chill the butter, the flour, even the bowl. Cold is control. It slows gluten formation, preserves discrete butter pieces, and delivers the flaky architecture you want. If the room runs warm, cool your hands under the tap and dry well before mixing.
Rub butter into flour with fingertips only, lifting as you go to aerate. Stop at coarse breadcrumbs with pea-sized flakes still visible; those flakes become laminated pockets of steam in the oven. Drizzle water gradually and toss with a table knife until it just clumps. It should look shaggy, even a little dry at the edges. If it looks perfect in the bowl, it will be tough in the tin. Turn out, bring together without kneading, and flatten to a disc.
Resting is non‑negotiable. Wrap the disc and chill for 30–45 minutes. This relaxes gluten and re-firms fat. For extra tenderness, many chefs add 1 teaspoon vinegar or lemon juice to the water; the mild acidity limits gluten strength. Worried about shrinkage? After rolling, give the lined tin another 15-minute chill. These pauses take time but save pastry.
Hands-On Techniques That Replace Gadgets
No stand mixer? Use fraisage. On a cool surface, push small portions of dough away from you with the heel of your hand, smearing butter streaks into the flour. One pass only; gather, rotate, repeat twice. This aligns fat into thin sheets and builds flake without special rollers. For rough puff, do three single folds: roll into a rectangle, fold like a letter, rotate 90 degrees, and chill between turns. Three swift folds beat a dozen fussy ones.
Lacking a rolling pin, rinse a wine bottle, remove labels, and lightly flour it. It’s perfectly weighted and long enough for even pressure. Rotate the dough, not the bottle, to maintain shape. For docking, a simple fork stops puffing in tart shells. For blind baking, line with baking paper and fill with dry rice, lentils, or clean coins. They conduct heat beautifully and cost nothing. A sharp kitchen knife trims edges cleaner than a pastry wheel; hold it vertical to avoid dragging layers.
Crimping is all fingers. Press with index and thumb inside the crust while the knuckle of the other hand pushes from the outside for a neat, bakery-style finish. No pastry brush? Use your fingers or a folded piece of paper towel for egg wash. Short on cutters? Upend a mug or glass for uniform rounds. If it’s flat, clean, and solid, it’s a pastry tool.
Everyday Kitchen Swaps for Professional Results
Flour matters. UK plain flour keeps crumb tender; if all you have is strong, swap out 20% for cornflour to soften protein. Butter is best for flavour, but a 70:30 mix of butter and lard gives exceptional flake. A pinch of caster sugar sweetens shortcrust destined for fruit; salt brightens savoury bakes. If your dough cracks, mist with water, wait one minute, and patch. For tears in a lined tin, press in a scrap of dough and chill; it will weld as it bakes. Never fight the dough warm; chill, then fix.
Control heat with what you’ve got. Preheat a heavy baking tray and set your tart tin on it to mimic a baking steel; the fierce contact heat banishes soggy bottoms. Tent edges with foil if they brown too fast. No piping bag for choux or sausage rolls? Snip a corner off a freezer bag. Need a quick glaze? Milk with a pinch of sugar browns nicely, while cream gives deeper colour.
Here’s a compact chef’s crib sheet you can stick to the fridge.
| Pastry | Ratio | Key Temperature | Rest/Chill | Oven Guide |
|---|---|---|---|---|
| Shortcrust | 3:2:1 (flour:butter:water) | Butter < 10°C | 30–45 min before rolling | 180–200°C, 25–40 min |
| Rough Puff | 2:1 (flour:butter) + enough water | Keep dough cool between folds | 15 min between each of 3 folds | 200–220°C, until puffed and deep gold |
| Sweet Shortcrust | 3:2:1 + 10% sugar | Chill well to reduce spread | 45–60 min before baking | 170–180°C, watch edges |
If humidity rises, dust surfaces lightly and roll fast; if dry, rest the dough longer to allow moisture to distribute. A final chef’s tip: paint a thin layer of beaten egg white inside blind-baked shells and return to the oven for 2 minutes to seal against wet fillings. Small interventions transform outcomes. Combined with patience, these swaps deliver the precision you thought only machines could manage.
In pastry, discipline is the true gadget. Keep it cold, move with purpose, rest between steps, and let time finish the job in the oven. With a bottle, a fork, and a heavy tray, you’ll achieve the flake, colour, and snap that bakeries boast about, at home, today. Technique, not tools, writes the recipe for success. Which of these simple, chef-approved habits will you try first—and what favourite filling will you wrap in your newly mastered crust?
Did you like it?4.5/5 (22)